Internet Problems? Here’s How to Tell if It’s Your ISP’s Fault
Updated Sep 29, 2022
Do your own investigation to find out if it’s really your fault.

Quick Links
No one likes internet downtime. It can make you feel completely crippled in your ability to work or communicate, control your home, or monitor your security system. But in those situations, how do you tell who’s to blame?
If It’s Not You, It’s Them
As remote work and smart home setups become more prevalent, our tolerance for connection failure is shrinking fast. Connection loss is a common intermittent occurrence, but what do you do when the problem becomes incessant and unmanageable? If your issues become persistent, it is possible that the root of the problem has nothing to do with your equipment or settings, but rather is due to a problem on the side of your Internet Service Provider (ISP) and may require a special line technician to intervene.
That may be easier said than done.
Home technician appointments almost never occur on the day you call in a complaint. In fact, chances are that appointments are booked as far as a month out, and getting a line technician to make an appearance is particularly tricky. Line technicians are different than the home technicians that typically answer house calls. Line techs address problems stemming from the main connection to the cable line outside your home.

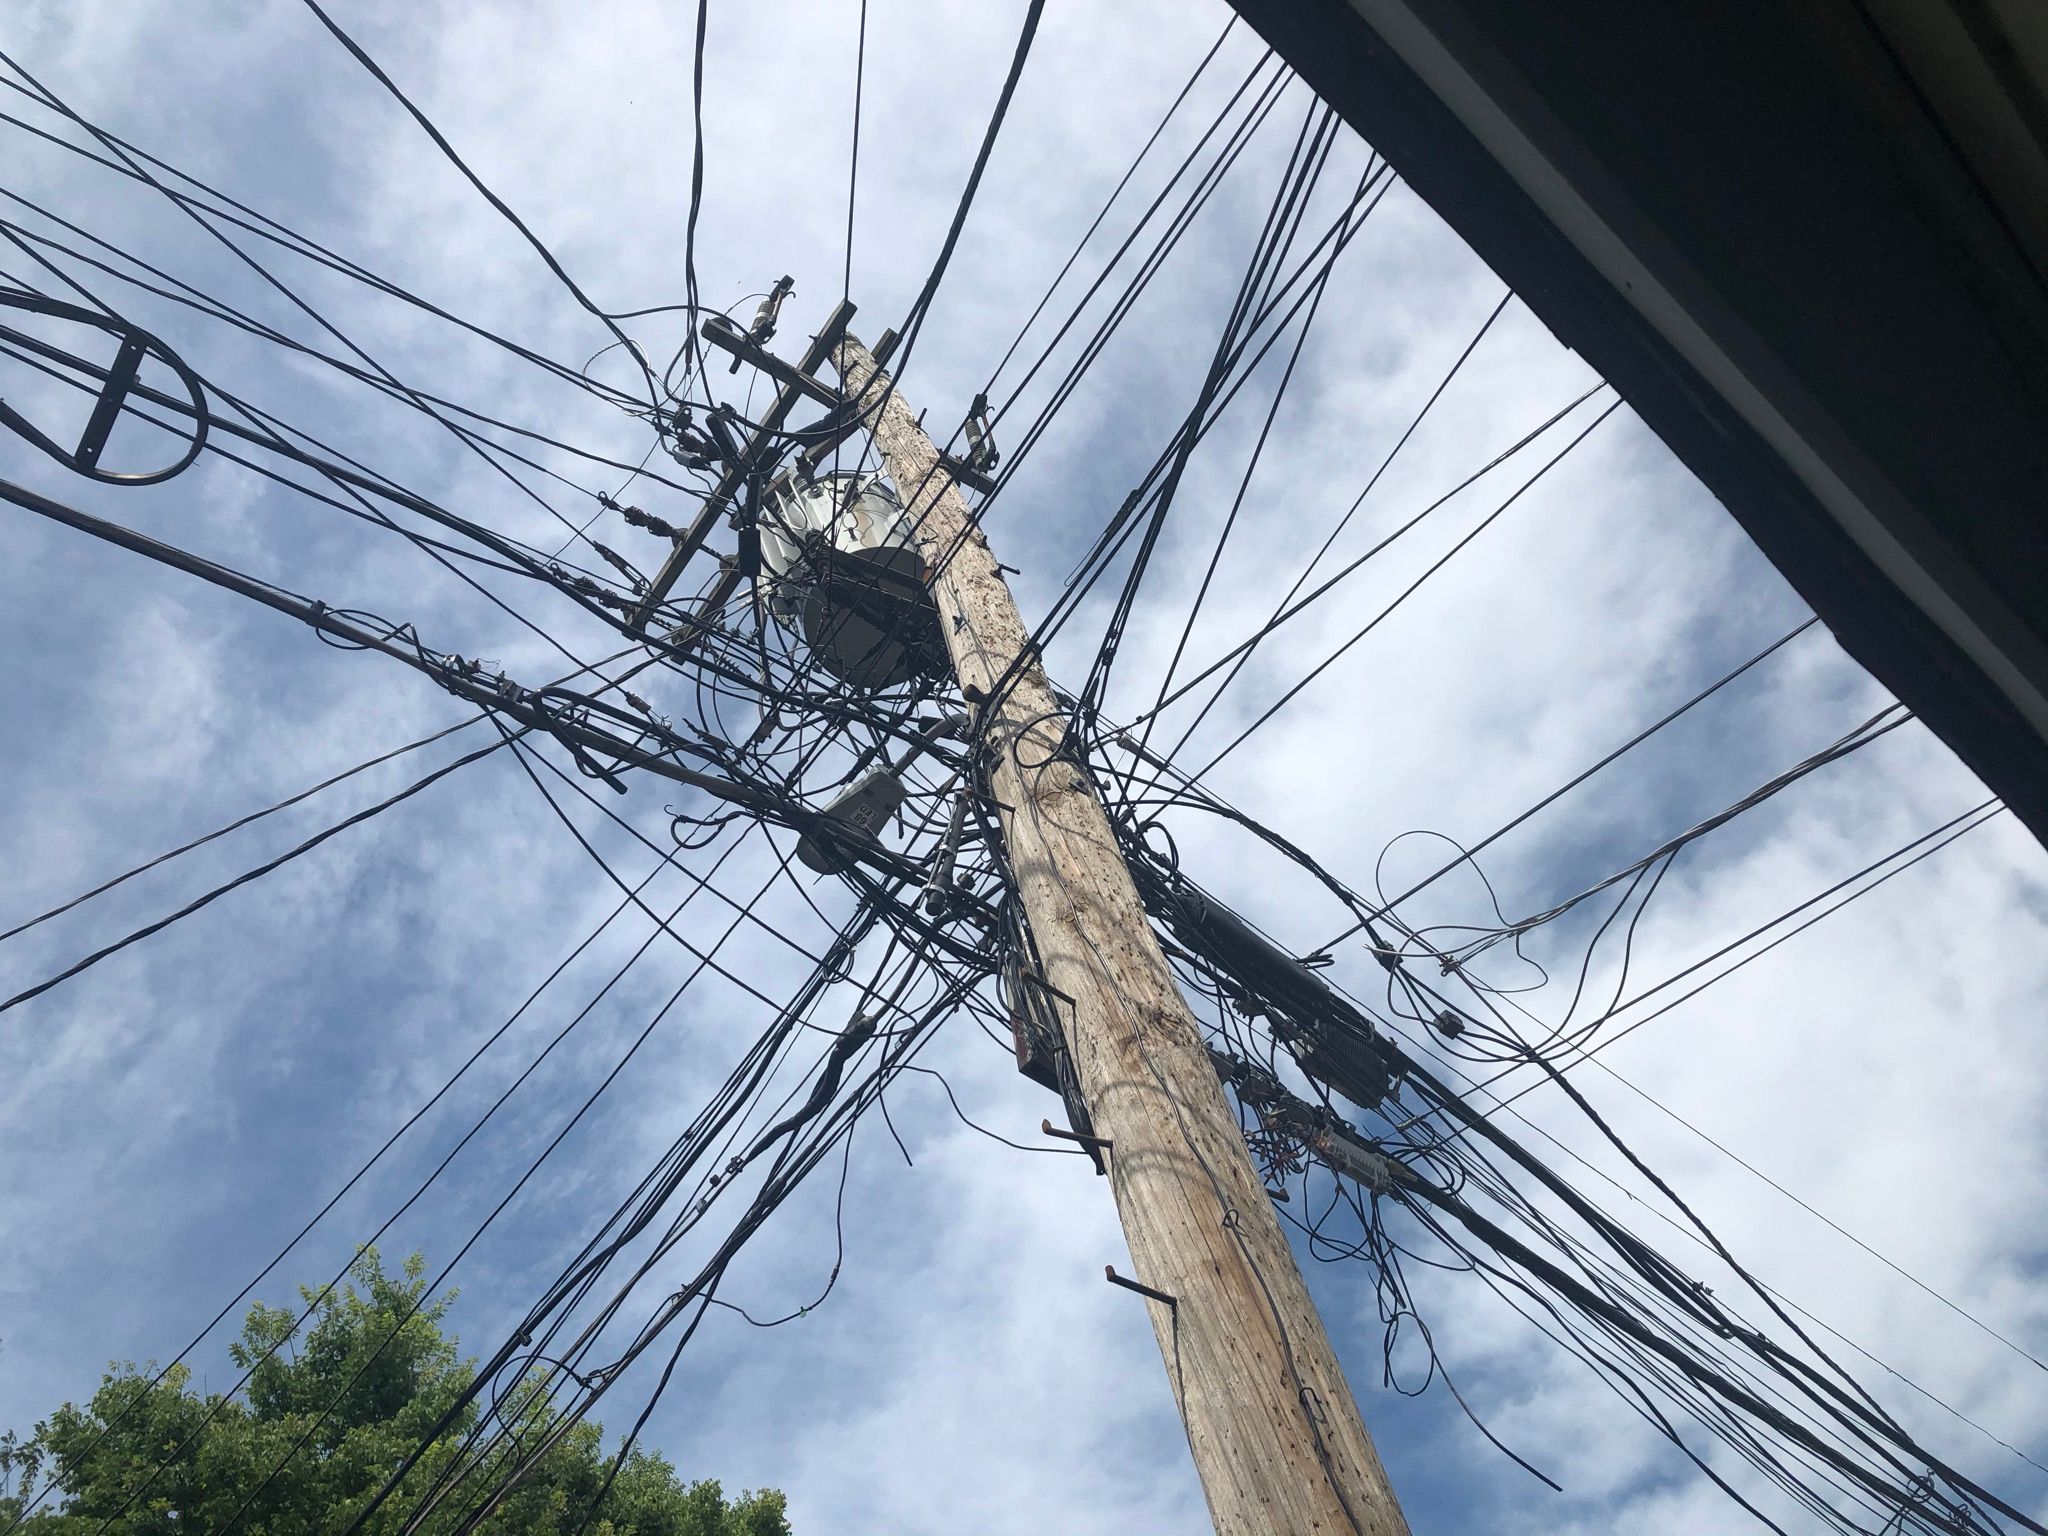
In cities, these main connections, or “drops” usually terminate near high voltage power lines and transformers, not to mention the seemingly endless intersecting tangles of cables, lines, and wires. The height, danger, and complexity of line servicing mean that line techs require special licensure and are very costly. Your ISP won’t be too keen on sending out the big guns for any old internet problem.
Related: How to Make Your Phone Useful When There’s No Internet
Ruling Out User-Side Problems
Before you start down the path of pursuing a line repair, it is important you take a calculated approach to ensure that the problem is, in fact, a problem that needs addressing by your provider and not something on your end. ISP customer support agents and home technicians will try and say most anything to avoid taking on the blame if you aren’t prepared with an exhaustive list of user-side troubleshooting steps you have already checked. We will start from square one.
You may have tried several, or all these already, but the checklist below will make sure you’ve examined your issues from all angles before tackling the task of getting a line tech to come out. Document your findings as you progress through this list.
Check Connectivity on Another Device
If you’re experiencing a connection problem, try connecting and testing your connection on another device of the same kind. To get fine-tuned results, use SpeedTest.net to get a gauge of your download and upload speeds.
Try Power Cycling the Problem Device
You will be able to quickly tell if the whole network is down, but if the issue is isolated to one device, shut it down completely, unplug it from power, and remove any batteries if possible. Wait at least 30 seconds and power the device back on. If the issue persists, move on to the next step.
Power Cycle Your Router
Unplug the router from power, wait at least 30 seconds, and power it back on. If that doesn’t fix the issue, move to the next step.
If you have any local file sharing or network storage devices, you should still be able to use them normally even if there is no internet connection to the outside world. If these protocols work fine, it further points to an issue with cabling, modem, or main line connection.
Power Cycle Your Modem
Follow the same routine as power cycling the router. Unplug for 30 seconds and power back on.
If you rent your equipment from your ISP, your modem and router are likely combined into one device.
Check the Modem Lights
Your modem will likely have at least four lights on the front that flash during the powering-on process. These lights indicate the status of four important parameters: Power, Downlink, Uplink, and Internet connection. They indicate success by lighting solid. If one of these lights doesn’t light solid and remains blinking, it may indicate to you the source of your incoming signal.

Kipp Burroughs
- Power: Indicates that the modem is connected to power and turned on.
- Downlink: This light is typically symbolized as an arrow pointing downward and indicates that the modem has established a connection to a downstream channel. This channel(s) brings data from the internet into your home/business.
- Uplink: This light is typically an upward pointing arrow and indicates attempted/successful connection to an upstream channel. This carries data from your home/business out to the web.
- Internet: This light is typically stylized as a globe and indicates that the internet is available. This light will not go solid if there is a failure of any of the previous three light confirmation.
Diagnose Your Cable Signal Quality
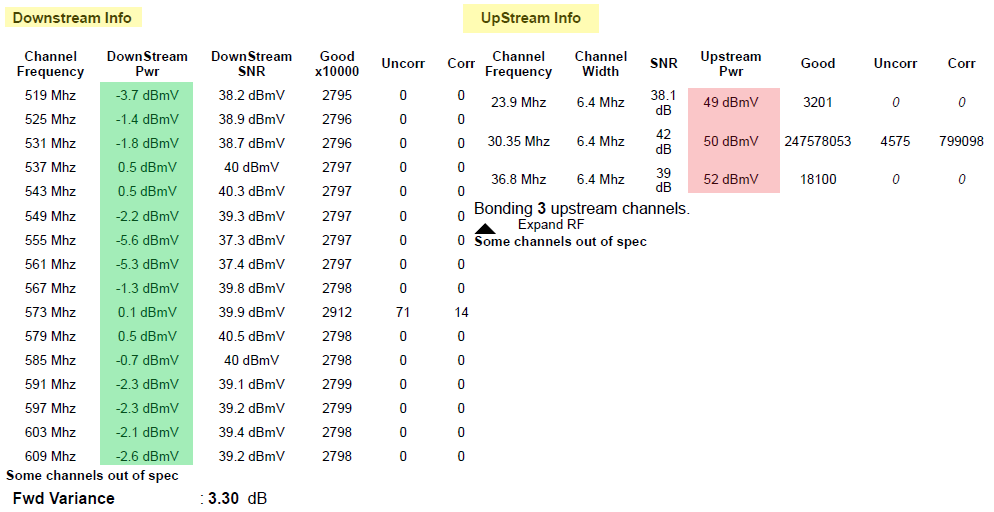
If the previous steps yielded no improvement, you can assess its cable connection quality via the modem’s graphic user interface (GUI). This interface is accessed using a normal web browser. It is here where you can find information about signal quality and power levels.
If you have a device with an ethernet port, use that to connect directly into one of the available ports on your modem. If you don’t have an ethernet-capable device, try using your WiFi connection. The following instructions are for a standalone modem. If you are using a router/modem combo rented from your ISP, you may be redirected to a web page prompting you to input your account login info.
Depending on your network configuration, accessing the modem GUI via WiFi may not be possible. Contact your ISP for more information.
Now open any web browser. Type your modem’s IP address into the address bar. This address varies between manufacturers, but the most common addresses are
192.168.100.1
and
192.168.0.1
. Once you’ve entered the correct IP, you will be greeted with a web page displaying the logo of your modem’s manufacturer. Use the page to navigate to the status page. Once there, you can analyze your power levels.

Kipp Burroughs
Ideal power levels can vary based on your router’s DOCSIS specifications. However, the modem used for this example is the Arris Surfboard 8200. It is one of the most popular modems in the world, and its firmware is used in the majority of ISP-leased modem/router combos. So, chances are that these target values apply to you
- Downstream power levels should be between -7 to +7 dBmV.
- Upstream power levels should be between 38-48 dBmV.
Interpreting Your Level Readings
Any power levels outside of the above ranges should be noted, particularly excessive upstream power values. Contrary to what instinct might tell you, high upstream power values indicate low power levels. Once your upstream power value increases past 48 dBmV, it means that your modem is having to work harder to output adequate upstream power. Once this value reaches 53 dBmV, the modem will automatically power cycle and retry the connection. This often results in a boot loop that leaves the modem unable to connect for hours or even days.
This is the most common cause of repeated modem connection failure due to power issues.
To learn more, check out how to read modem diagnostics.
What Now?
Whether or not your power level investigation yielded any significant findings, you will still want to assess your environment to look for any last-ditch fixes. First, check for outages. Visit your ISP’s Twitter and check for any posts concerning service interruptions or system maintenance.
If that turns up nothing, sites like Downdetector can provide more info. These sites are online communities where service users can report disruptions. If your issues pertain to a larger local outage, you may just need to wait it out. If there is not a larger outage, continue by checking your modem and cabling environment.
Rule Out Overheating Issues
Your modem should be stationed in a cool, dry place with access to open air. Like any electronic device, your modem can be prone to overheating if placed on carpet or in small, enclosed spaces. Ensure that your modem is not placed directly in the sun.
Environmental Signal Interference
Your modem and the cable that provides your broadband should be positioned a safe distance from any possible sources of radio interference. This includes microwaves, air conditioners, refrigerators, and other large appliances. Take note if your connection seems to be affected when using a certain appliance.
Inspect Your Cable Run

Kipp Burroughs
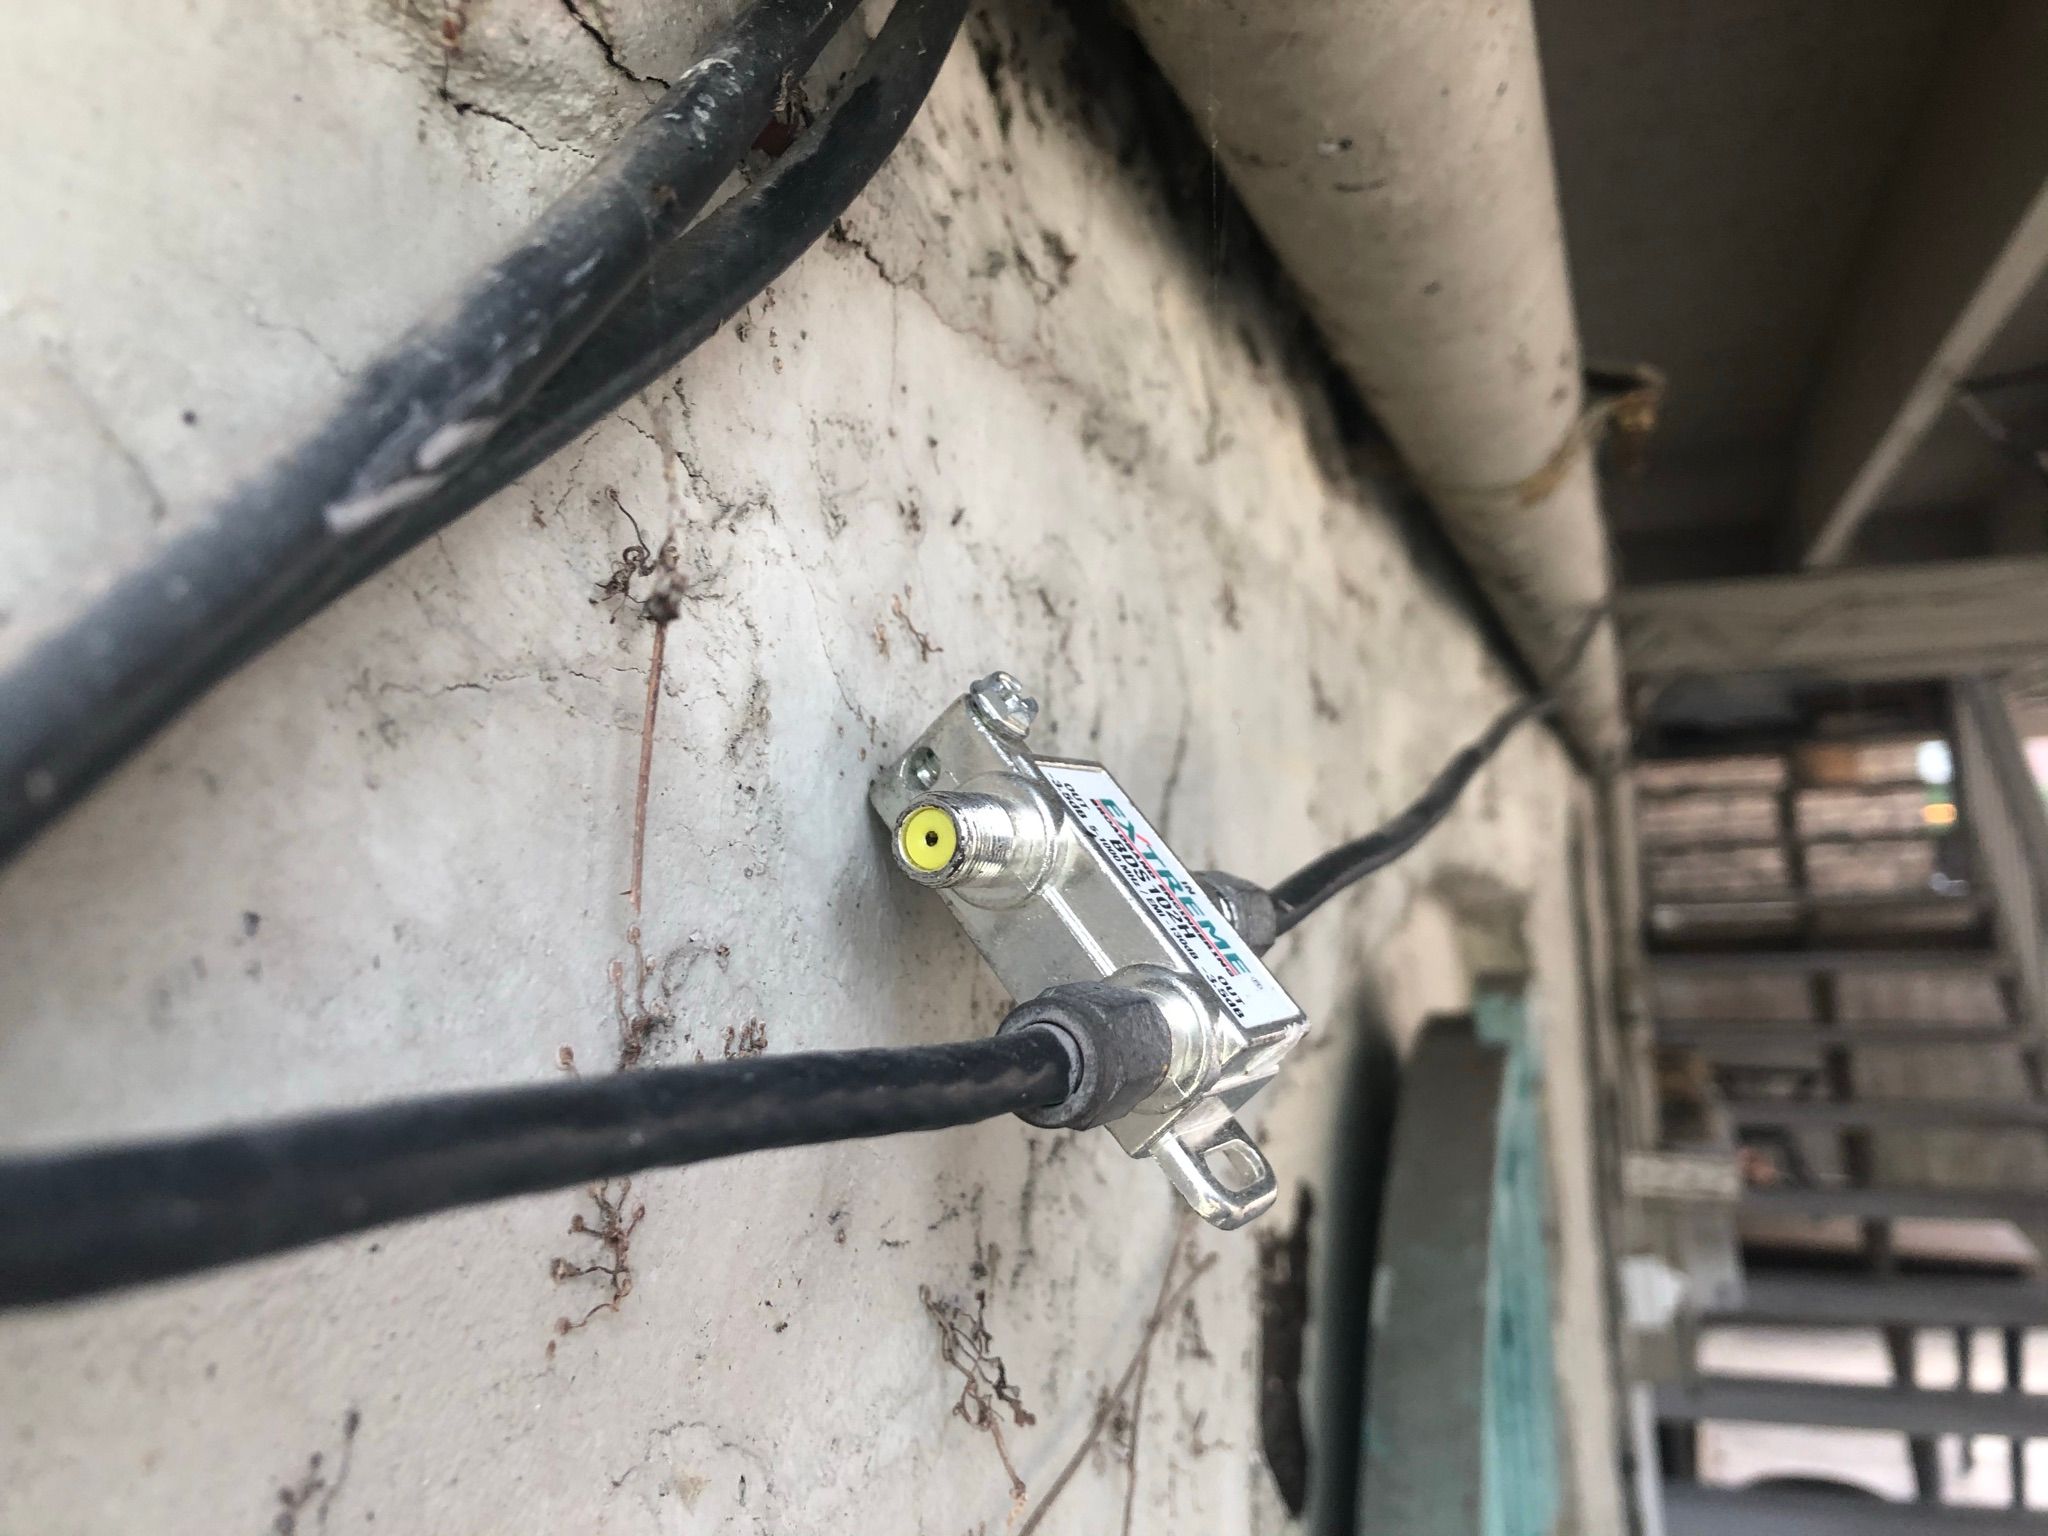
Lastly, you will want to trace and inspect the placement and physical quality of the cable line itself. This may not be possible if your cabling is hidden in your walls. However, if your cable runs along the outside of your building as mine does, trace back along its entire length as far as you safely can.
Keep a sharp eye out for things that may indicate a damaged cable. Physical deformities like cracked insulation, chew marks from animals, or sharp bends may be the source of your internet problems. In this case, you would likely need a new cable run.
Connection points should be dry and free of corrosion. Along with physical deformities, keep an eye out for any unnecessary splitters along your cable run. Splitters are small metal devices used to create two cable outputs from one input. They are commonly used to provide cable TV to multiple televisions in the home. Their usefulness is fading as the world moves toward more internet-based entertainment access.
While splitters are fine for multiplying incoming television signal, they can produce unstable broadband signal. Remove any splitters from your cable run if possible. To do this, simply unscrew the connectors just like you would on a modem or cable television. You will be left with two male coaxial connectors. To bridge them together, be prepared with a coaxial coupler.
Prepare Your List of Findings and Demand a Line Inspection
With this checklist at the ready, you are equipped with some knowledge and terminology to force your ISP to take further action in rectifying your connectivity issues and compensating you for prior downtime. This can be a lengthy and trying effort. Be persistent, and good luck!
Readers like you help support How-To Geek. When you make a purchase using links on our site, we may earn an affiliate commission. Read More.
Related Topics
About The Author
Copyright © 2024 Valnet Inc.